Assigning BrandChamps to tiers
Tiers are defined using BrandChamp tags.
Tags are how you segment, group, and target your BrandChamps within the platform.
You can assign one or more tags to each BrandChamp and use those tags to:
- Control which activities or rewards are shown to them.
- Send targeted emails.
- Organize BrandChamps by behavior, product preference, lifecycle stage, or custom logic.
🧠 Note: BrandChamps never see the tags assigned to them.
📦 Filtering activities and rewards by tag is available on Growth plan and up.
🏁 Assigning Tags During Onboarding
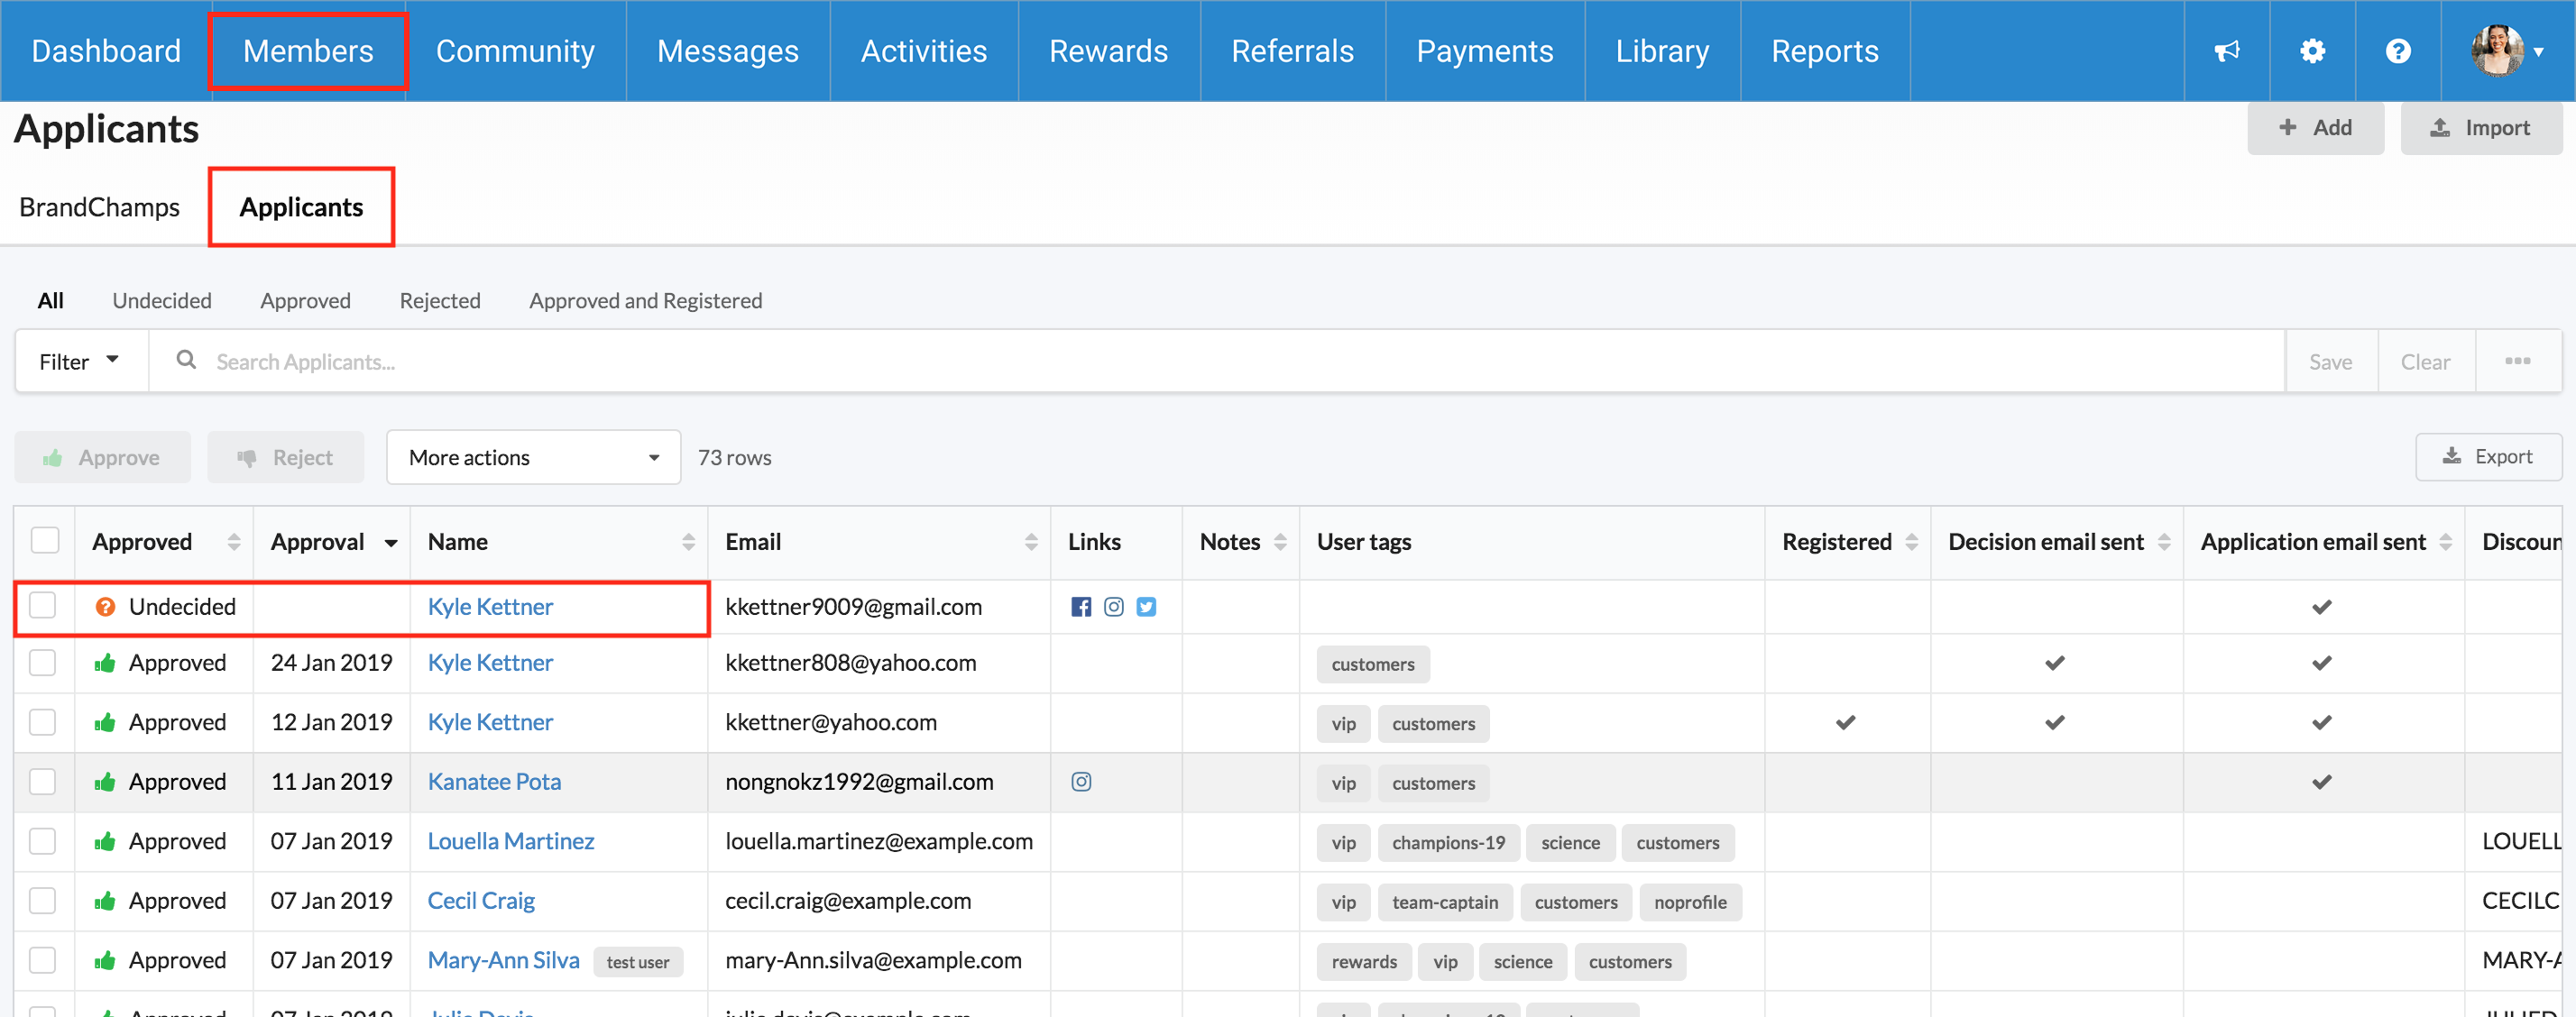
- Go to Members > Applicants tab.
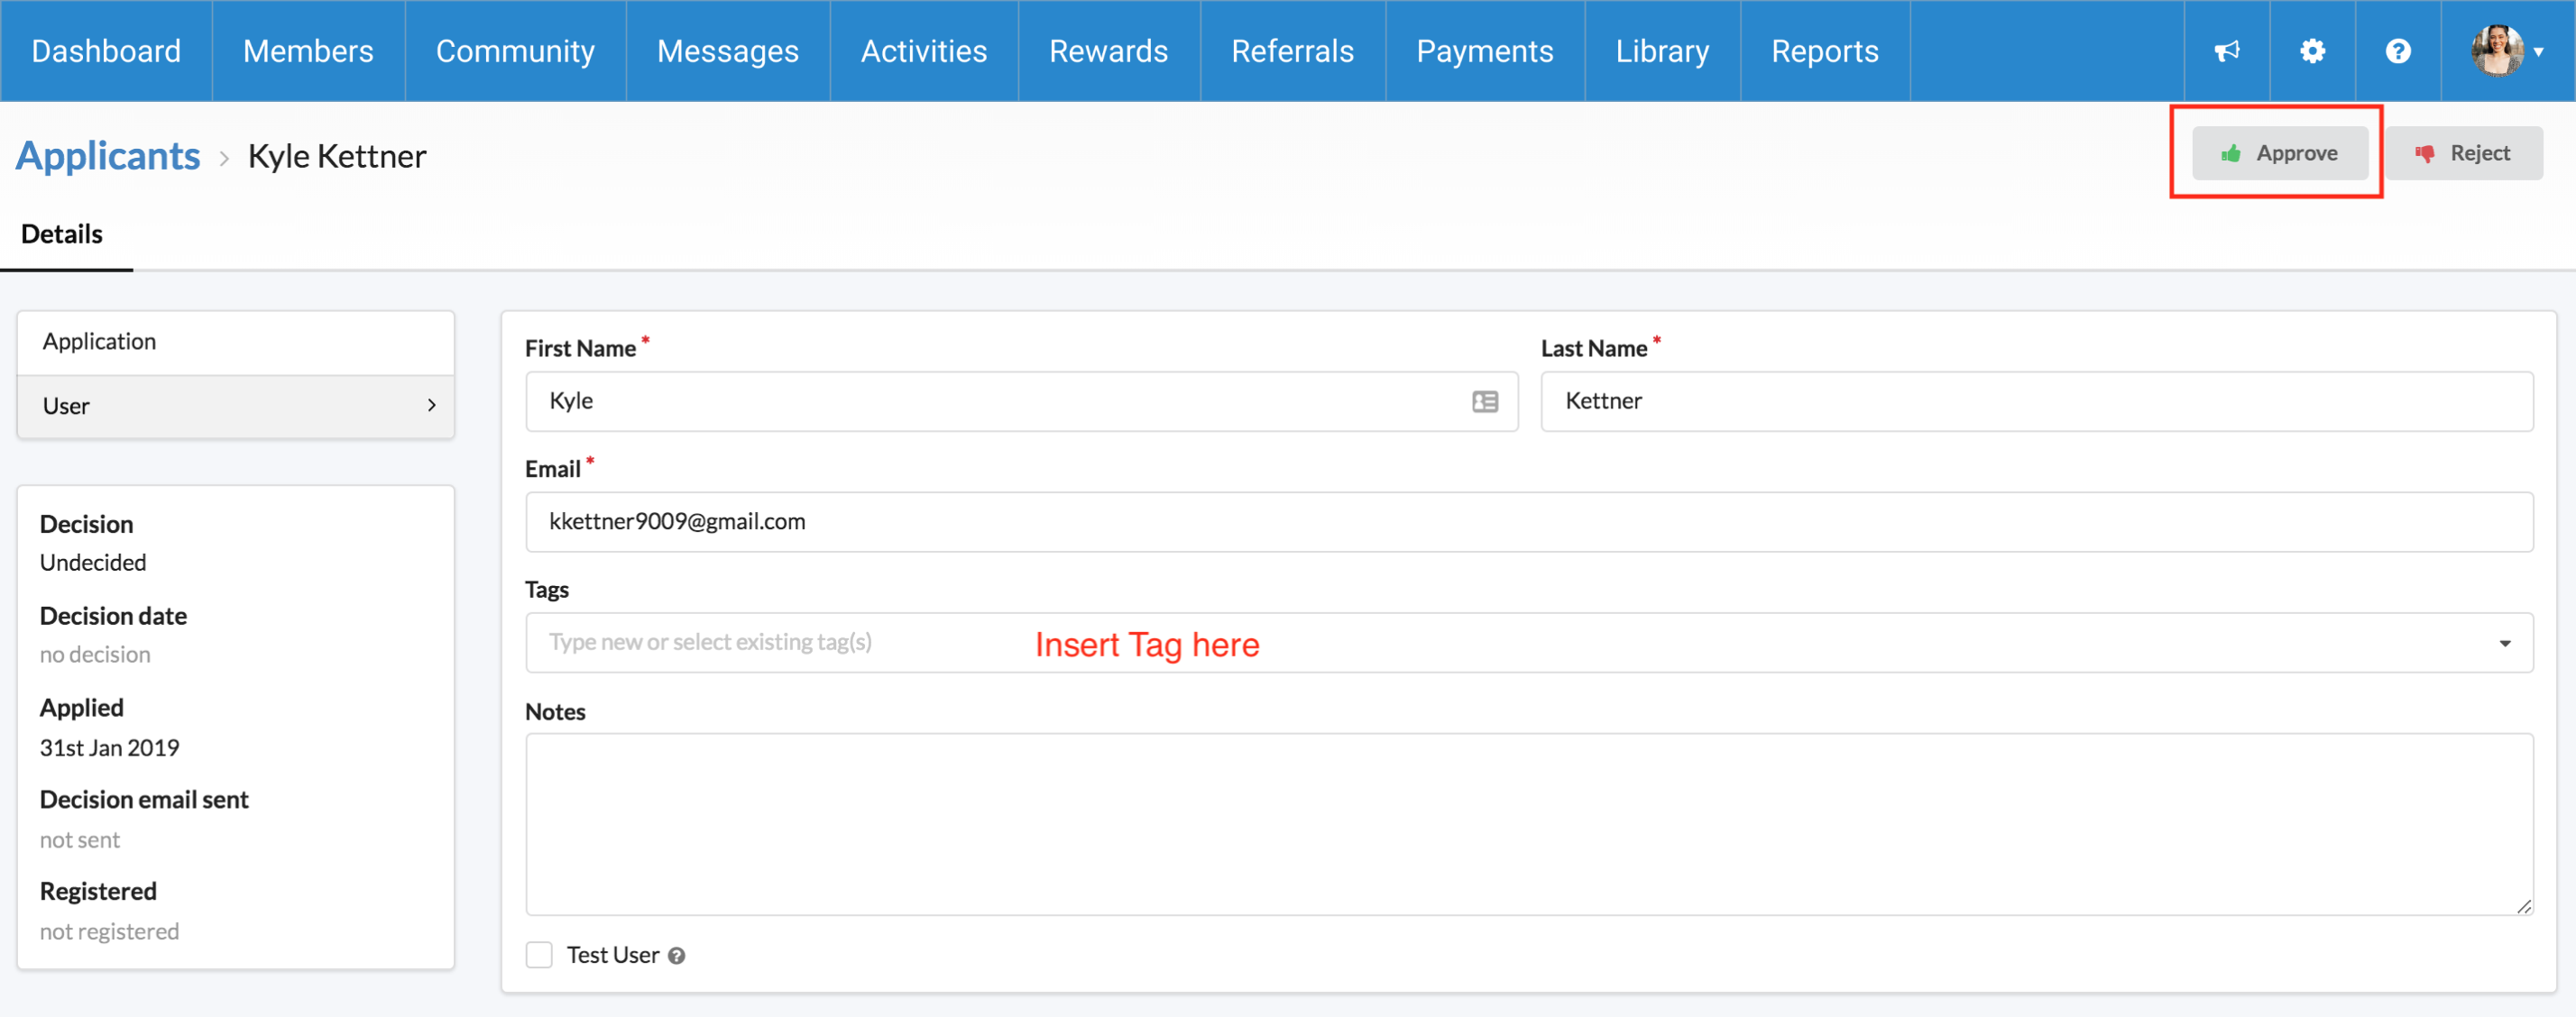
- Click on a BrandChamp's name to view their application details.
- In the User tab, add tags in the tag input field.
- Click Approve once you’ve added the desired tags.
✏️ Adding or Editing Tags for Existing BrandChamps
- Locate the BrandChamp you want to update.
- Click their blue name link to open their profile.
- On the User tab, add or edit tags.
- Click Save to apply changes.

📁 Bulk Tag Updates via CSV Upload (New!)
If you need to assign tags to multiple BrandChamps at once, especially using data from external tools (e.g., CRM, surveys, lifecycle systems), you can upload a CSV file.
See: 📘 How to Bulk Update BrandChamp Tags via CSV Upload
🧠 Use Case Examples for Tags
- vip, gold, affiliate: Tier-based grouping.
- review, ugc, first-order: Behavior-based tracking.
- skincare, tech, home-decor: Product interest.